The Photographer’s Footwear

I was meeting a friend in the city for dinner. For reasons I can’t remember I arrived a couple hours early, but hey, I was cool with that because Street Photography! I wasn’t super dressed up, but you know, a little nicer than just t-shirt, jeans and tennis shoes. I spent about two hours walking around DC looking for photographs. I had on nice shoes. Not nice as in comfortable; nice as in good looking, sporty. An hour or so into my strolling I noticed my feet were sore. But I shook it off… hey, feet get sore! Photos need taking! I ambled on.

It wasn’t until the next day I came to understand the foolishness of walking around for two hours on pavement and cement in sporty looking boat shoes with little to no support. Plantar fasciitis. It took a few weeks for the pain to go away, because, you know… I have to walk everyday… on my feet. But going out to make photographs eventually stop being painful. From now on I aim to keep it that way.

To make quality photographs, you need quality footwear.

teva sandals, quality footwear

When the image you hoped for doesn’t materialize

From far above the river I saw this great blue heron standing still on the rocks below. It was right on the river’s edge, waiting patiently for a passing meal. I carefully made my way down over fallen tree limbs and loose rocks. As I got closer I would stop occasionally and make a few photographs. After about five minutes I’d edge myself closer and wait and shoot some more. Then scoot a little closer still. I eventually got myself into a good position about 15 to 20 feet away.

From the moment I first saw the heron I imagined a photo of a good size fish struggling in that stiletto beak. I waited over an hour, sitting uncomfortably on solid rock, hoping for the bird to snag a catfish or bass from the water. There were several attempts, yet each came up empty. From my perch above I could see the occasional shadow of a fish swim by, but the heron either didn’t see it or it was too far out of reach to even try.

At one point another heron landed nearby. It was apparently just a little too close for comfort and this one chased it off. Then as it made its way back to its fishing spot I made this shot. Ultimately, other obligations made it impossible to stay any longer so I never got the fish-in-beak shot. But I’ll be back. And so will the herons. I’ll get the shot. Just going to take some patience.

Great blue heron at the potomac river near great falls, Virginia.

Sometimes the image you hoped for doesn’t materialize.
But that shouldn’t mean you come away with nothing.


Don’t listen to the snobs, the pop-up flash is not an amateur’s tool.

I think it’s unfortunate that you can still find people out there bad mouthing the built-in or pop-up flash as a feature only “amateurs” use. They think a true “pro” would never waste their time with it. I think that’s snobbish and self defeating. Don’t listen to them.

The pop-up flash is an important and useful tool.

Fill Flash: Portrait in a non-formal portrait setting. Main light coming from window, camera right. One side of face lit, other side shadow. Dial down the pop-up flash to -1.3 EV. I find this puts just the right amount of light in there. Catch light in the eyes. It just fills in, doesn’t overwhelm. ( -1.3 EV worked for me in this case. Do some experimenting and see what works best for you.)

Portrait of John. Fuji X100S. 1/125 sec f 5.6. Built in flash fired at -1.3 (I believe!) Fills in shadow side of face just a touch. Small catch light in eyes.

Portrait of John. Fuji X100S. 1/125 sec f 5.6. Built in flash fired at -1.3 (I believe!)
Fills in shadow side of face just a touch. Small catch light in eyes.


Main Flash: Flowers in the shade. Sure, lovely colors. But flip the flash up, dial it down to about -0.3 EV and shoot. All those colors will now pop. More vibrant than without.

Flowers without flash.

Flowers without flash. Fine image. Nice colors.

Flowers with flash.

Flowers with flash. A little more vibrant.

Modified: This is useful for all kinds of flash/strobe photography, so I thought I’d toss it in here for a little extra tip. Using gaffer tape or, as I do, small strips of velcro, affix a 1/4 CTO gel to the flash and you get a more natural color temperature. Not that cold bluish/white color. It’s a slightly warmer tone and is usually very pleasing. I like this for almost everything, but definitely when shooting people.

Amber gel affixed to the pop-up flash of a Nikon D700 using custom cut velcro strips.

Amber gel affixed to the pop-up flash of a Nikon D700 using custom cut velcro strips.

Getting creative: Follow this link to a previous post on how to get an off camera soft-box look using your pop-up flash, a spoon and a white piece of paper (or–in this case–the back of an 8X10 print)!

5 tips for becoming a better photographer

national gallery of art, washington dc, photography tips,

-know your camera inside and out-

Whatever camera you have — SLR, mirrorless, point & shoot, iPhone — what matters most is that you know it! Know its every quirk. Know how the flash system works. Know what all the dials are for. Know every page of the menu system. When you pick up the camera you should not have to think. It has to be second nature. One of the best ways to achieve that comfort level is to get out and shoot as much and as often as possible. But have it down pat before your first big assignment! Don’t want to be fooling around with buttons, dials and menus while the bride and groom impatiently stand by!

-R-E-S-P-E-C-T-

I don’t think photographers should strictly avoid shooting homeless people or the indigent or the mentally disabled. However, I hope photographers would first ask themselves, “Why?” Why am I photographing that guy sleeping on a bench? That lady in the tattered, dirty clothing? The young man talking erratically to himself? Show some respect. Think before you shoot.

-step outside your comfort zone-

Are you a portrait photographer? A wedding photographer? Have you ever tried street photography or nature photography? You should! Exploring different styles is nerve wracking and exhilarating at the same time. It also gives you an informed appreciation for the work of others. And it affects the way you shoot your everyday work. Much of what you learn from one genre can be applied to another. Expand your horizons.

-become an avid reader-

Fiction and nonfiction. Learning how the world works and seeing the world through the eyes of others is vital for a well rounded life. Reading lets us step outside our bubble, literally and figuratively. Ultimately, this helps photographers approach their subject with more empathy, creativity, and thoughtfulness.

-avoid cliches-

Give the obvious a wide berth. Someone jumping over a puddle? A cactus in foreground with snow-peaked mountain in background? An old nun walking past a poster of a scantily clad woman? If you think you’ve seen it a million times before, do yourself (and the rest of us!) a favor, don’t click the shutter.

Wildlife Photography with an iPhone.

Move slowly, be patient. This is my mantra when it comes to wildlife. And it is especially important when you’re without a telephoto lens!

This morning as I walked along the C&O Canal towpath I saw a heron far up ahead as it landed on the edge of the trail. I was armed only with my iPhone so I thought I’d see how close I could get before it took off. And who knows, I thought, maybe it’ll fly in my general direction and I’ll get a shot as it soars past.

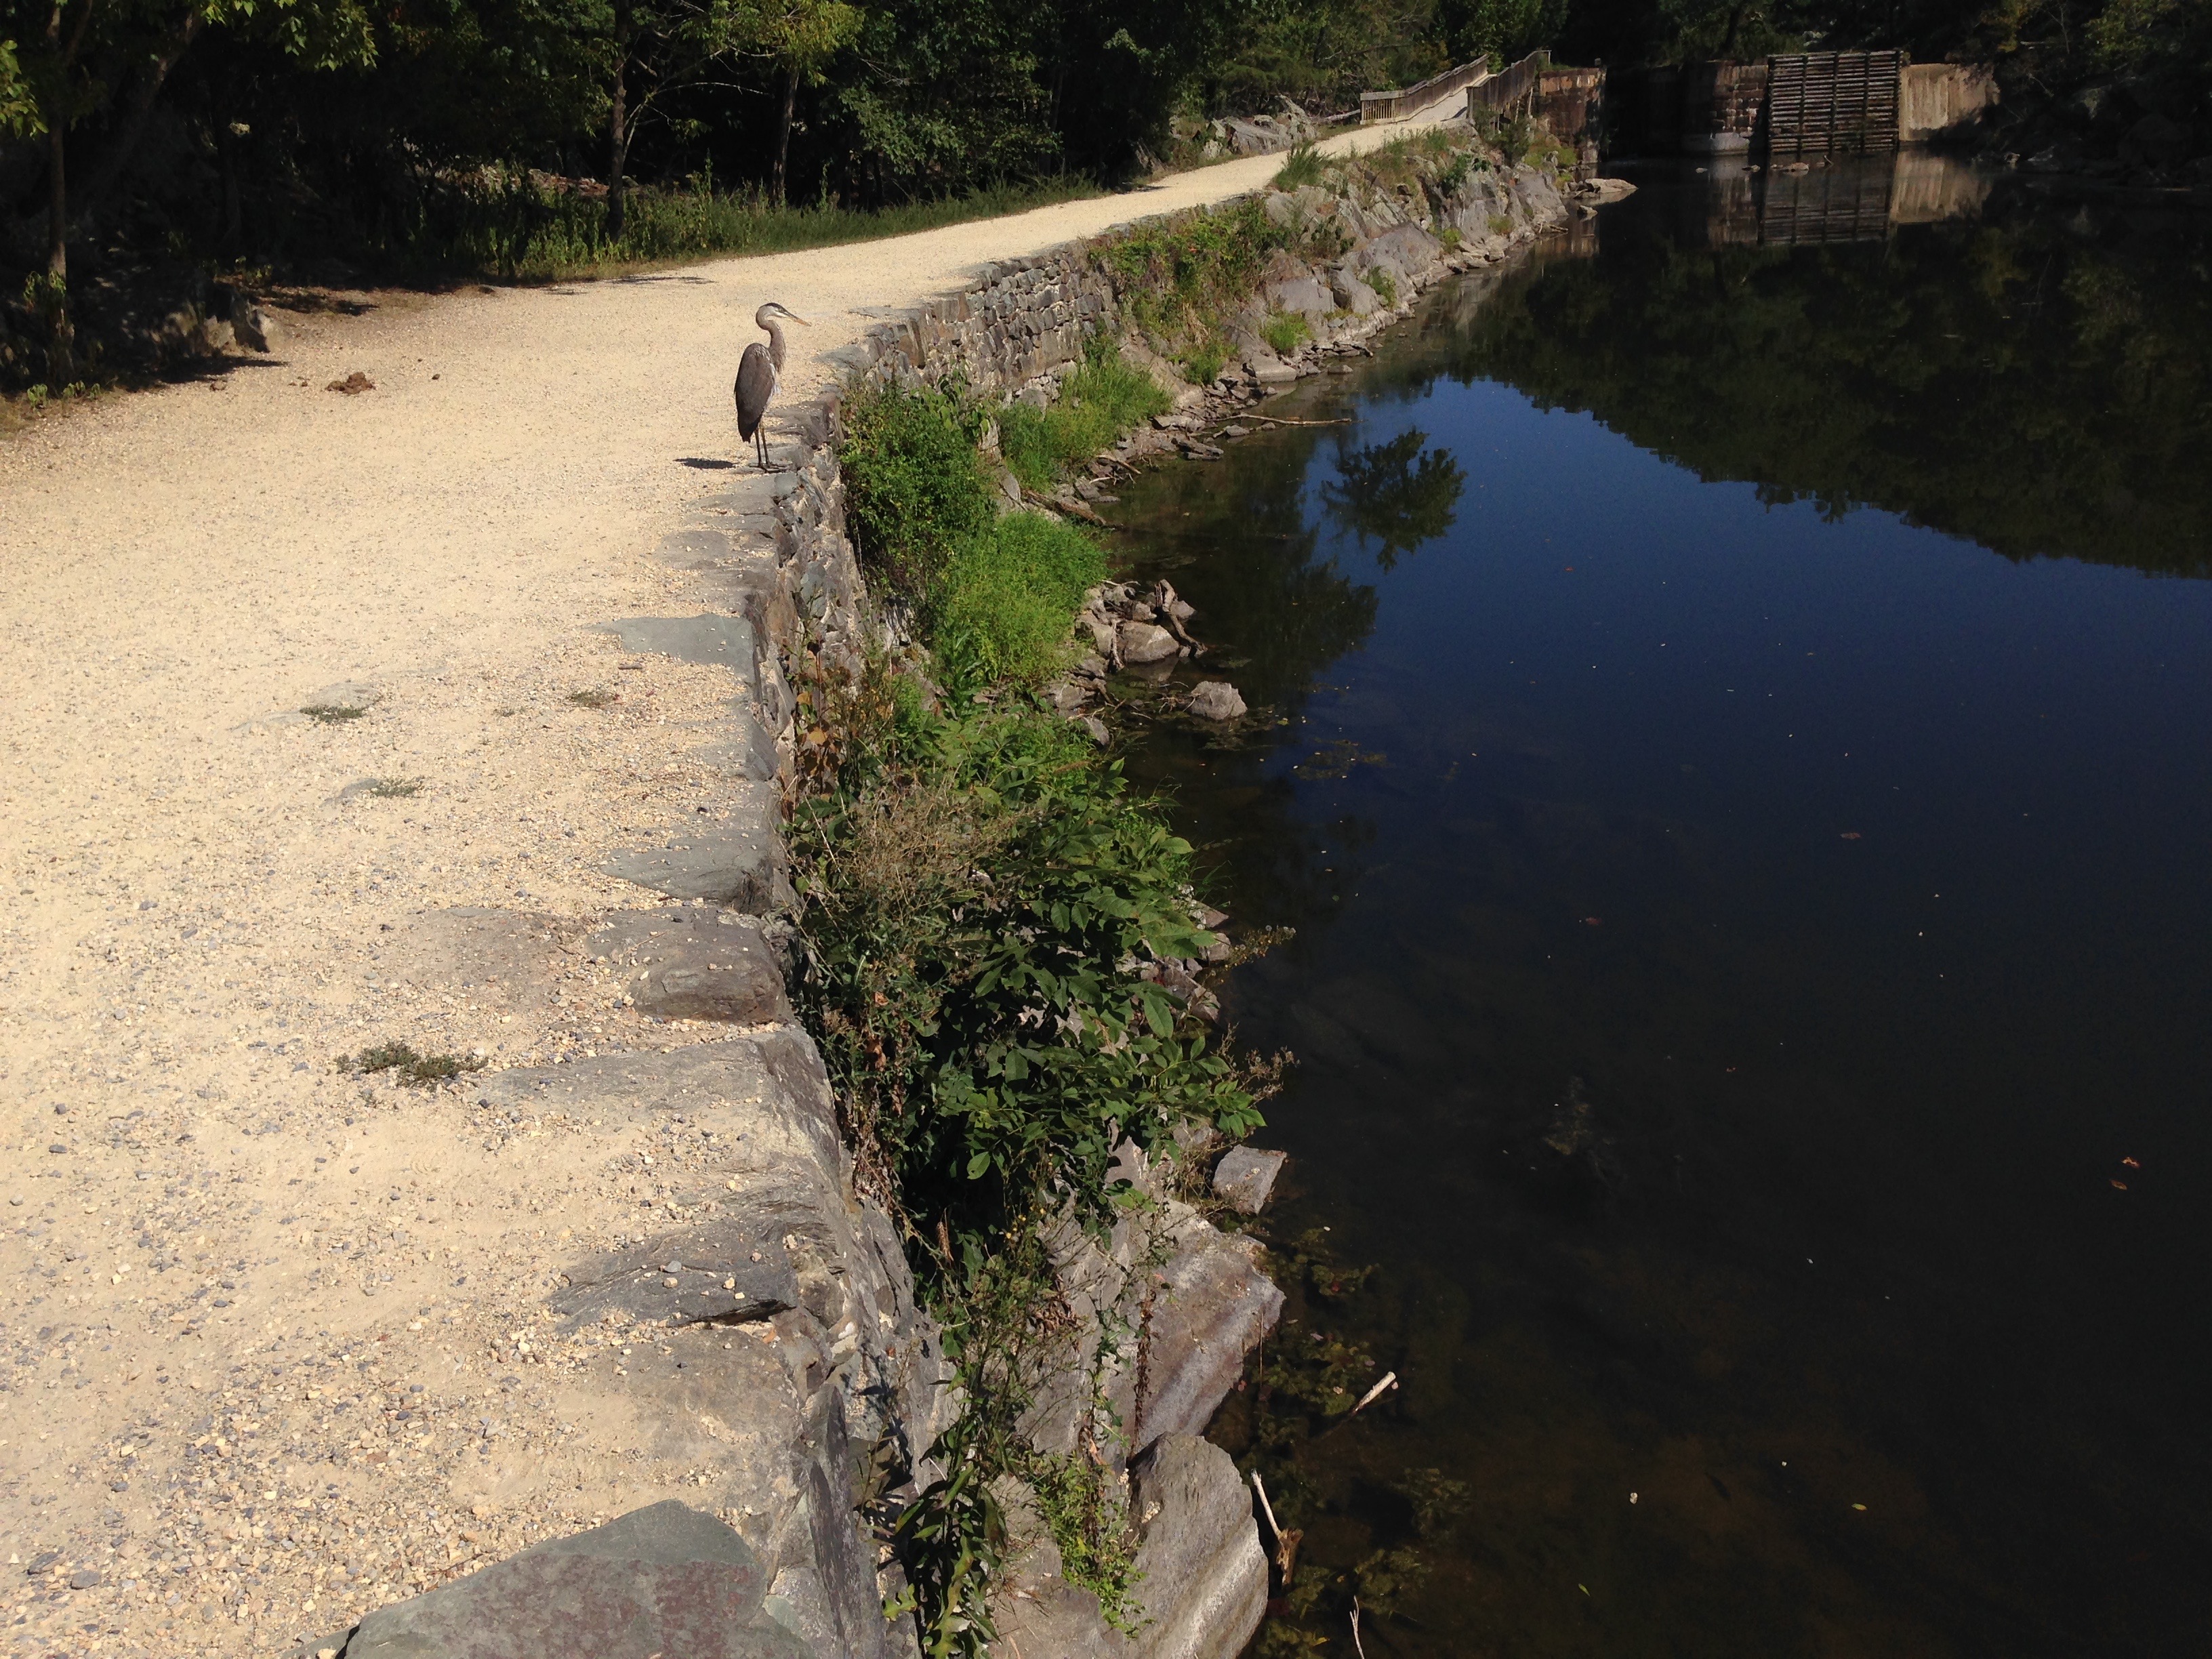
This was my first photo. (I’ve edited out many more that were repetitious and didn’t add to the story) From this point on I closed in… little by little, pausing between each small step.

IMG_1114


The bird did not seem troubled by my presence so I pushed on. Step… Pause… Step… Pause…

IMG_1118


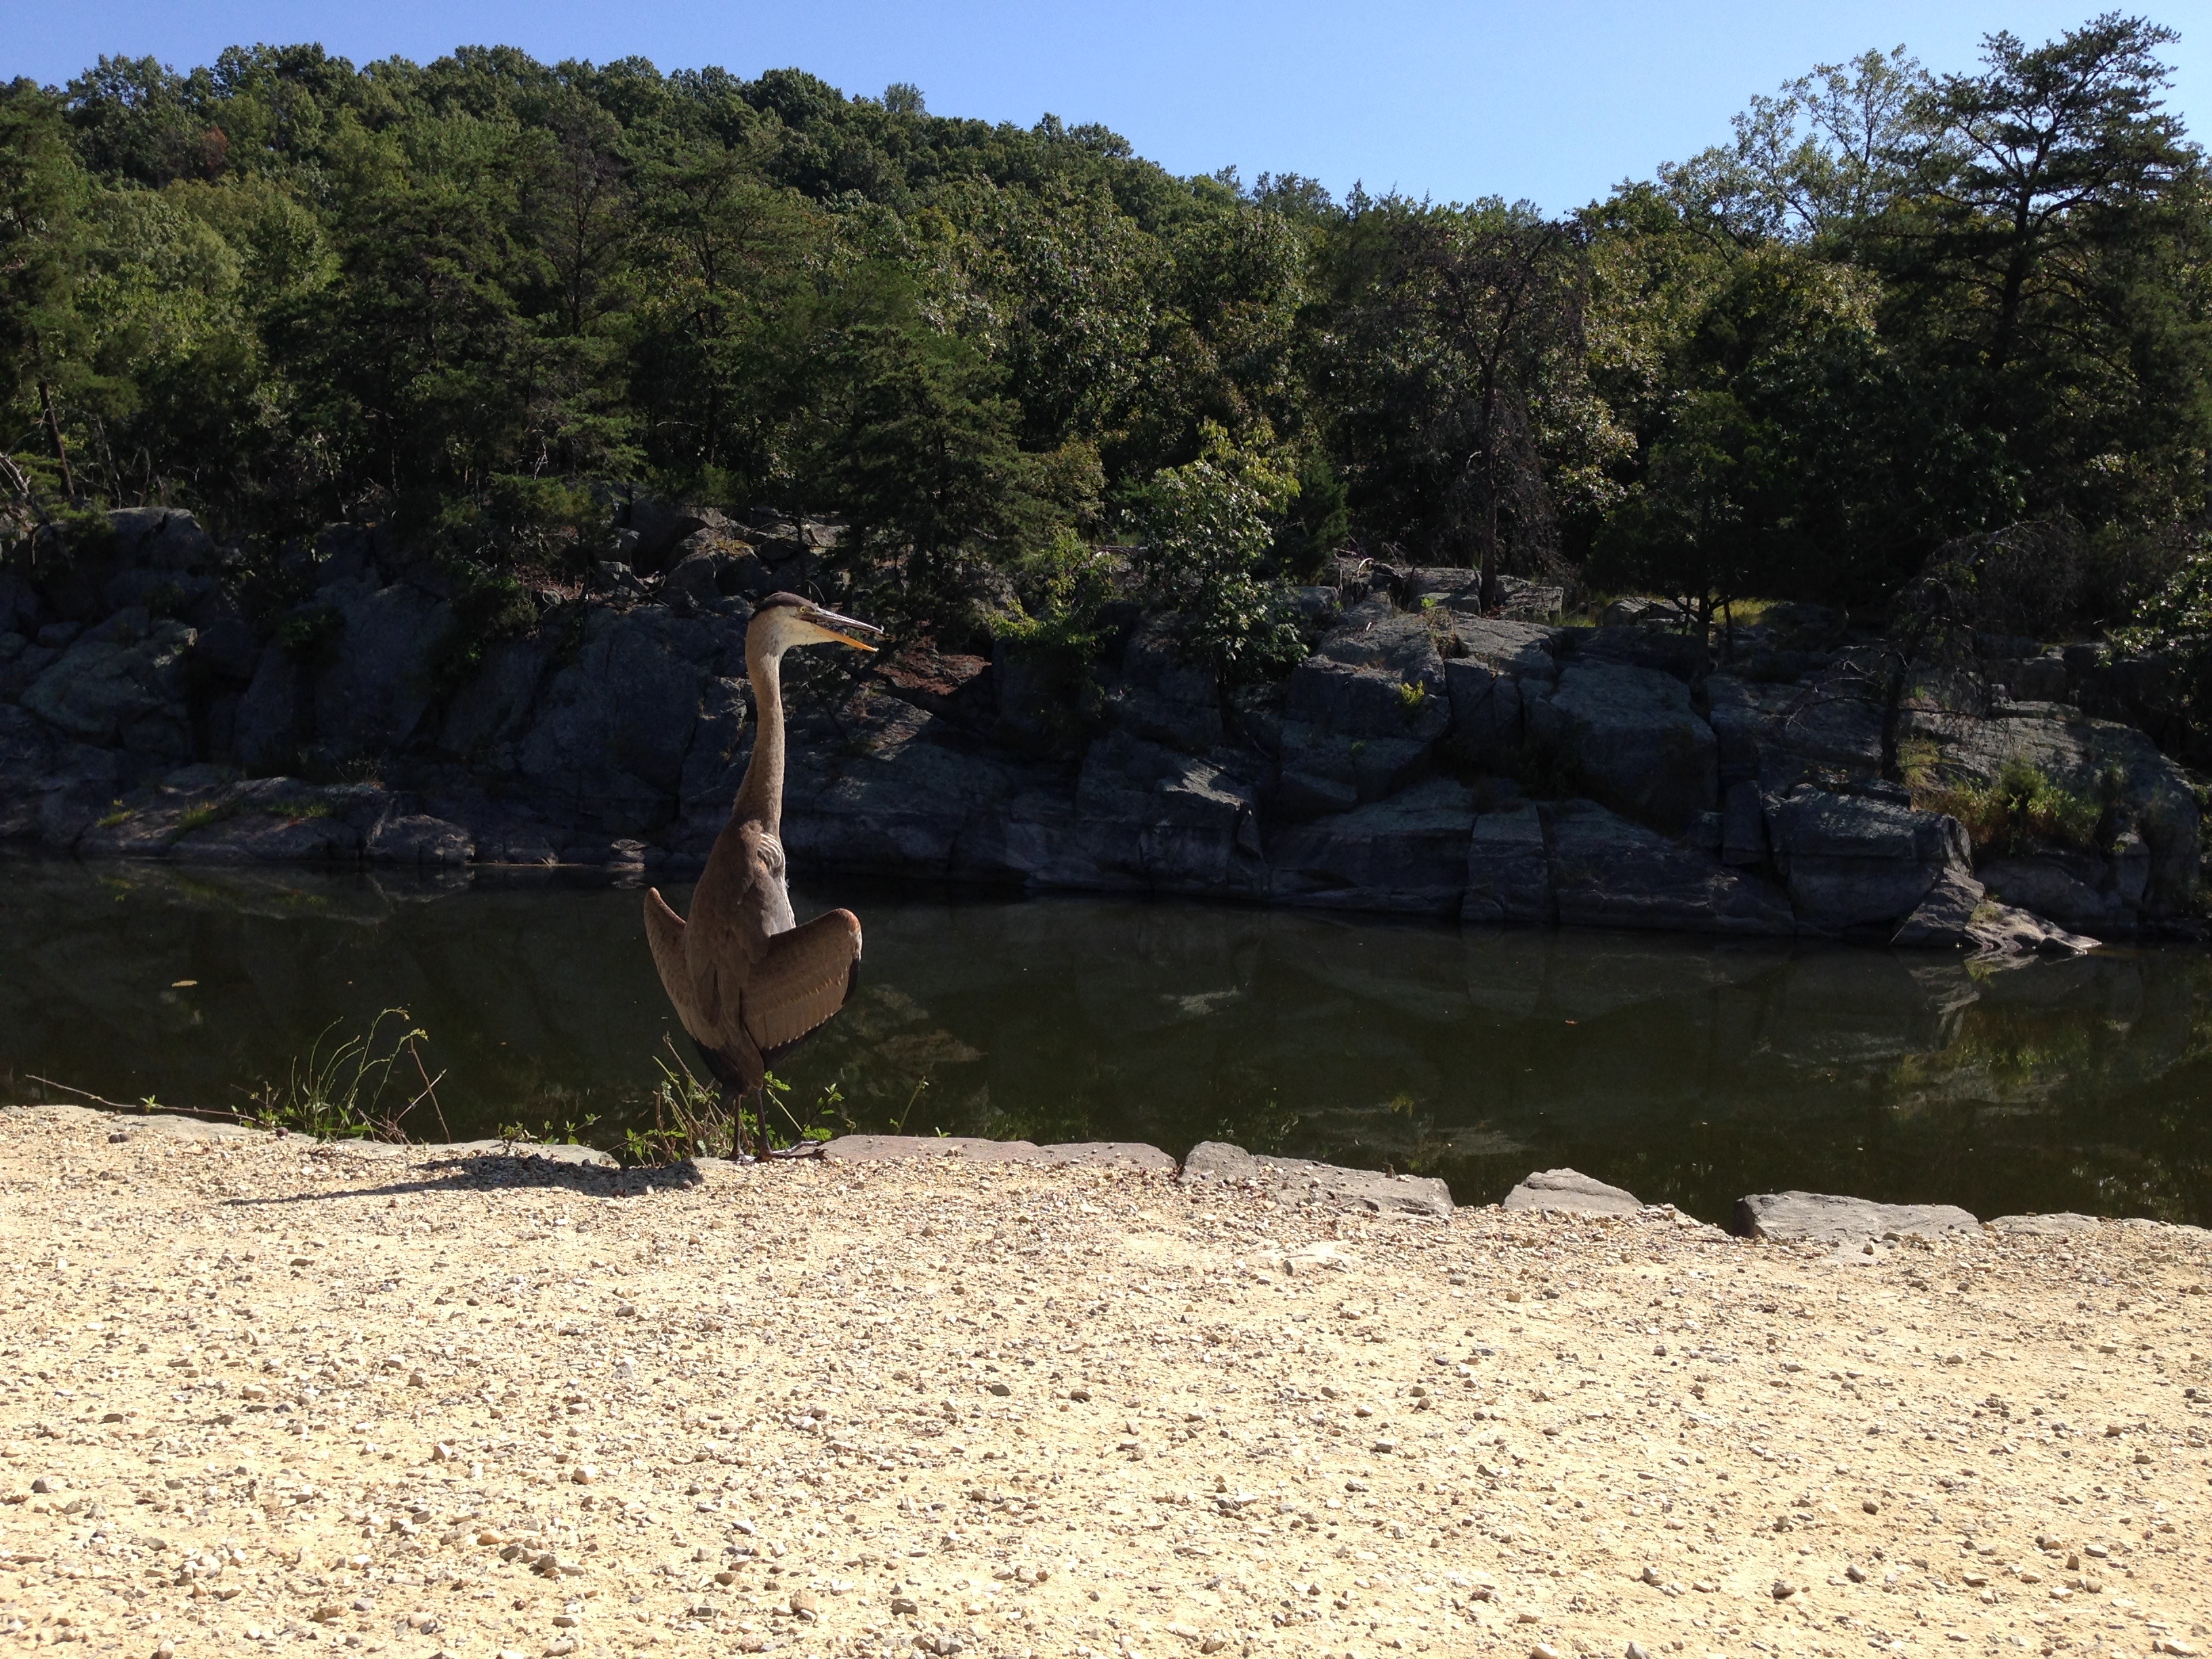
At this point I was kind of hoping the creature would just take off and give me that nice action shot I was thinking about. A bird standing still isn’t all that remarkable. But no… It seemed to be perfectly content to hang out. So I moved closer. Step… Pause…

IMG_1128


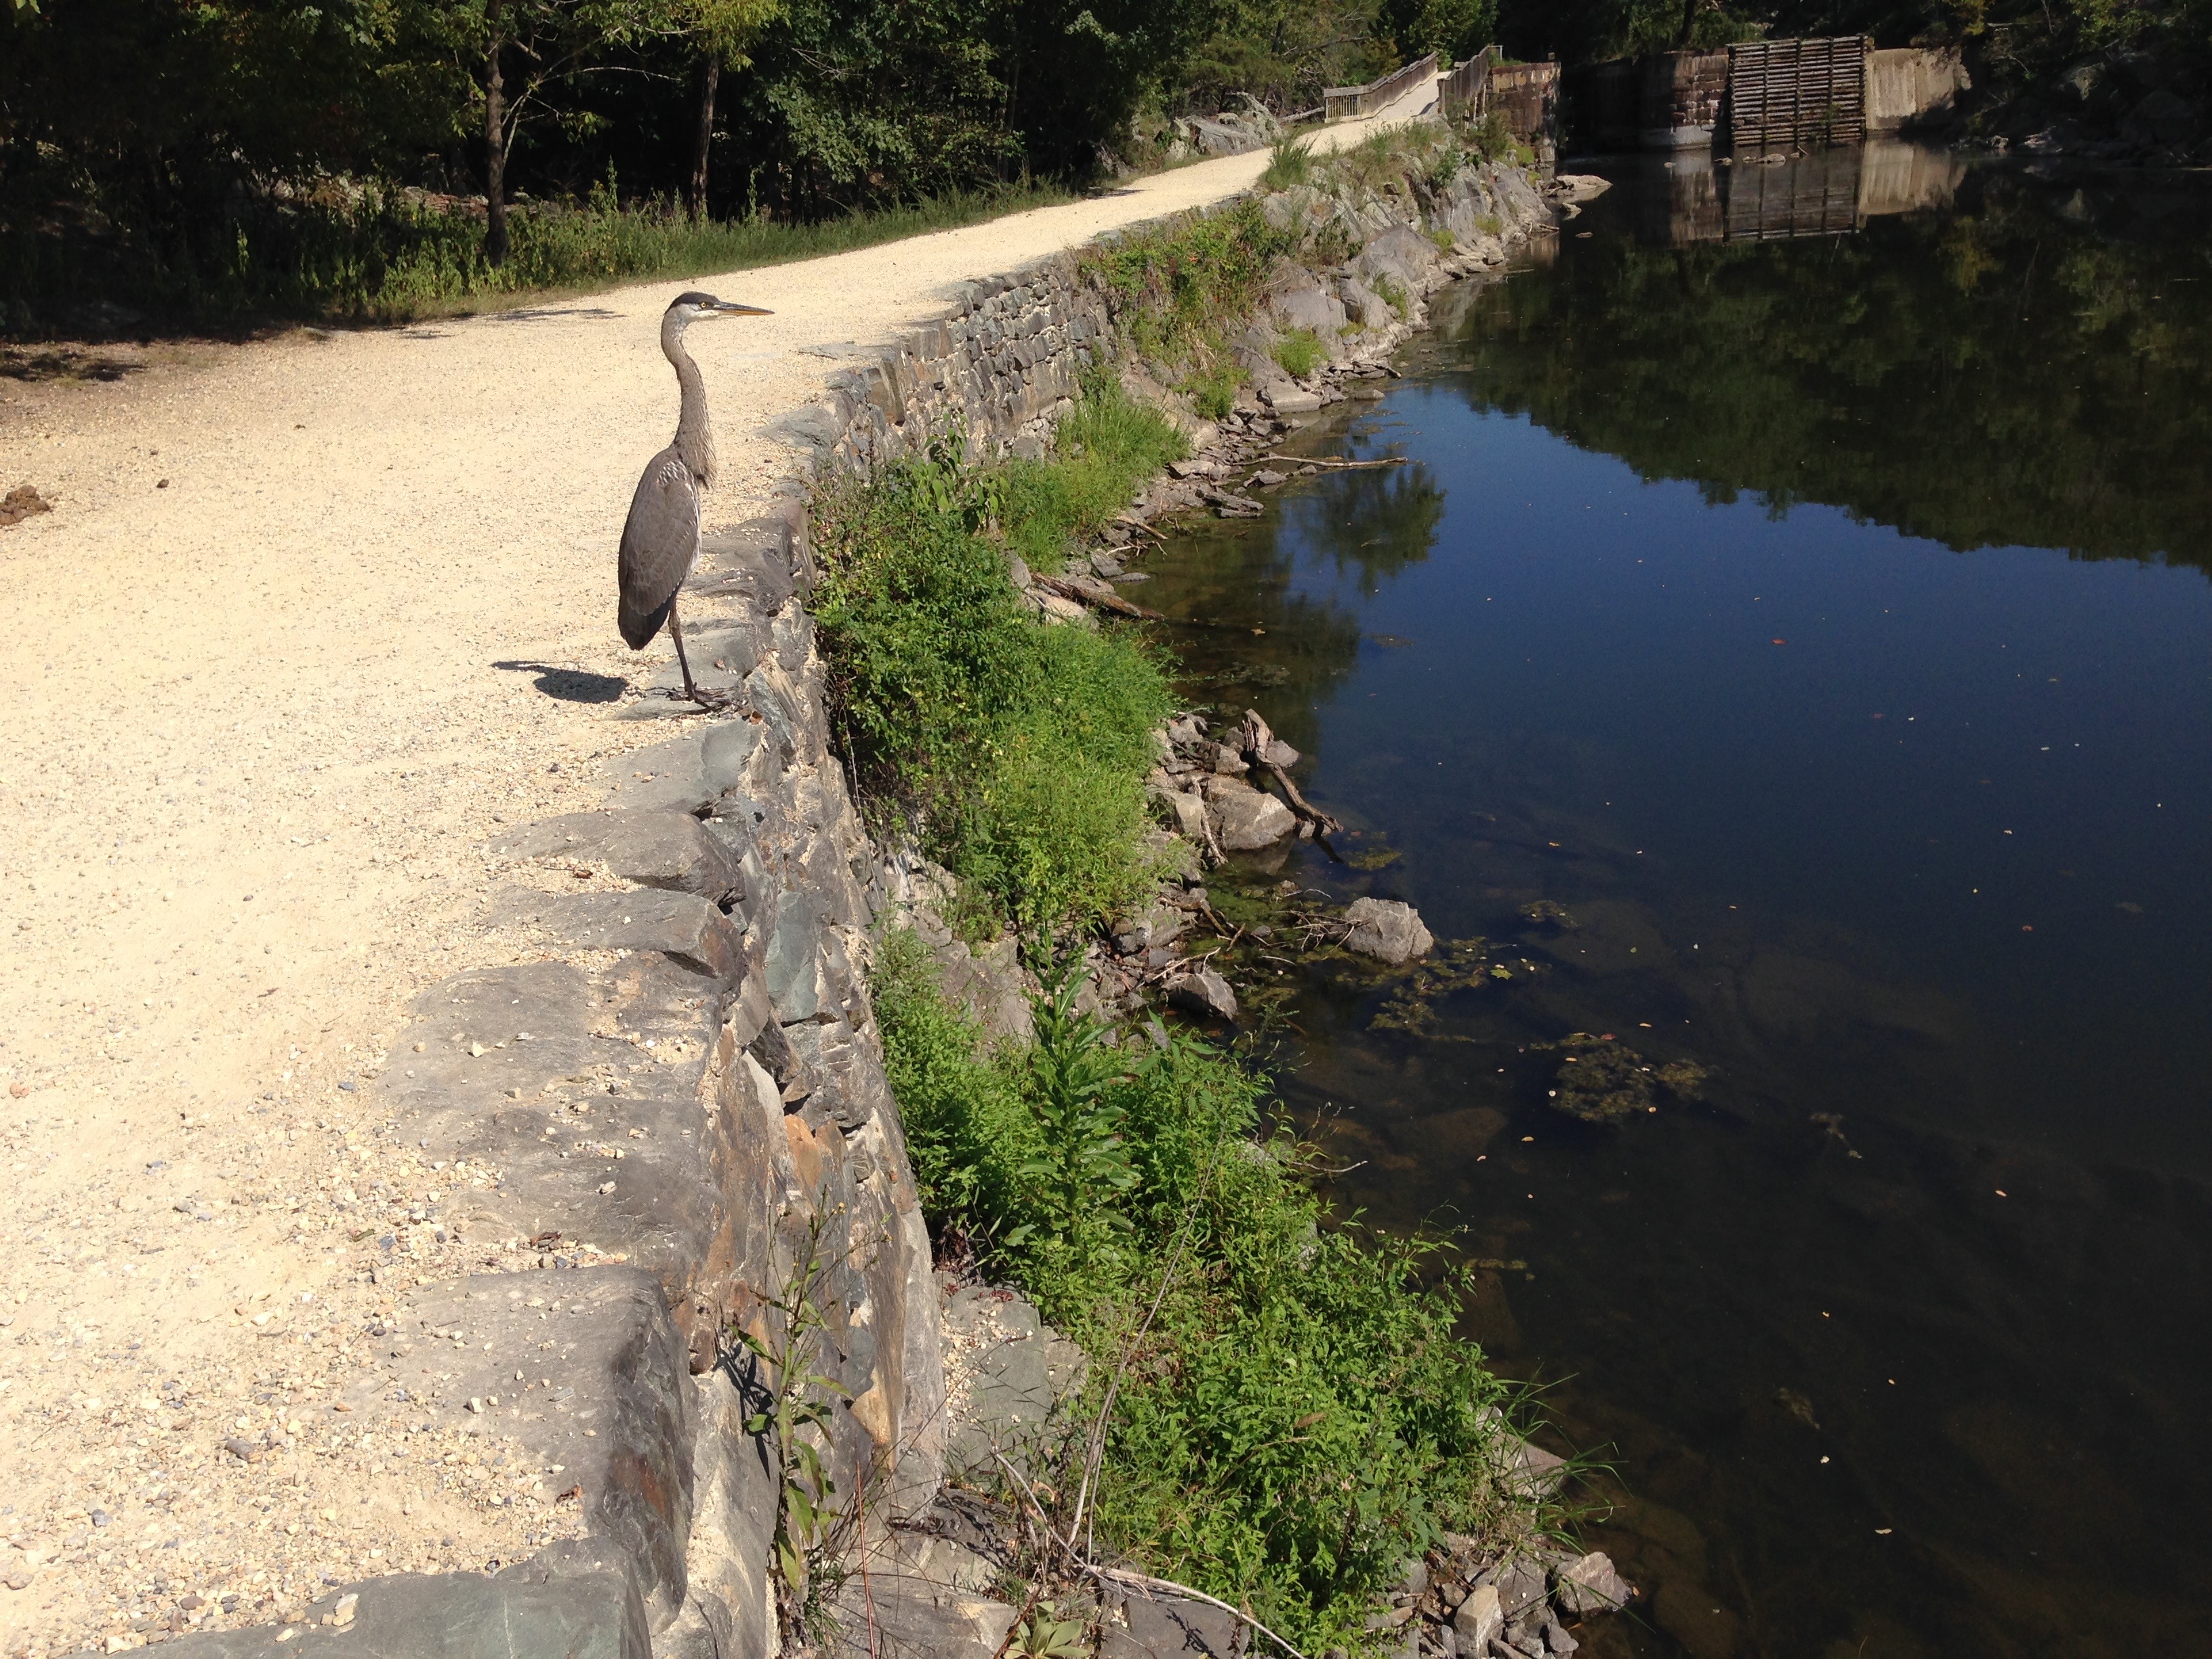
Now it’s just getting ridiculous. I’m within 10 feet! It has to be feeling a little uncomfortable with this human’s presence, right? Surely you want to fly away! Apparently not.

IMG_1135


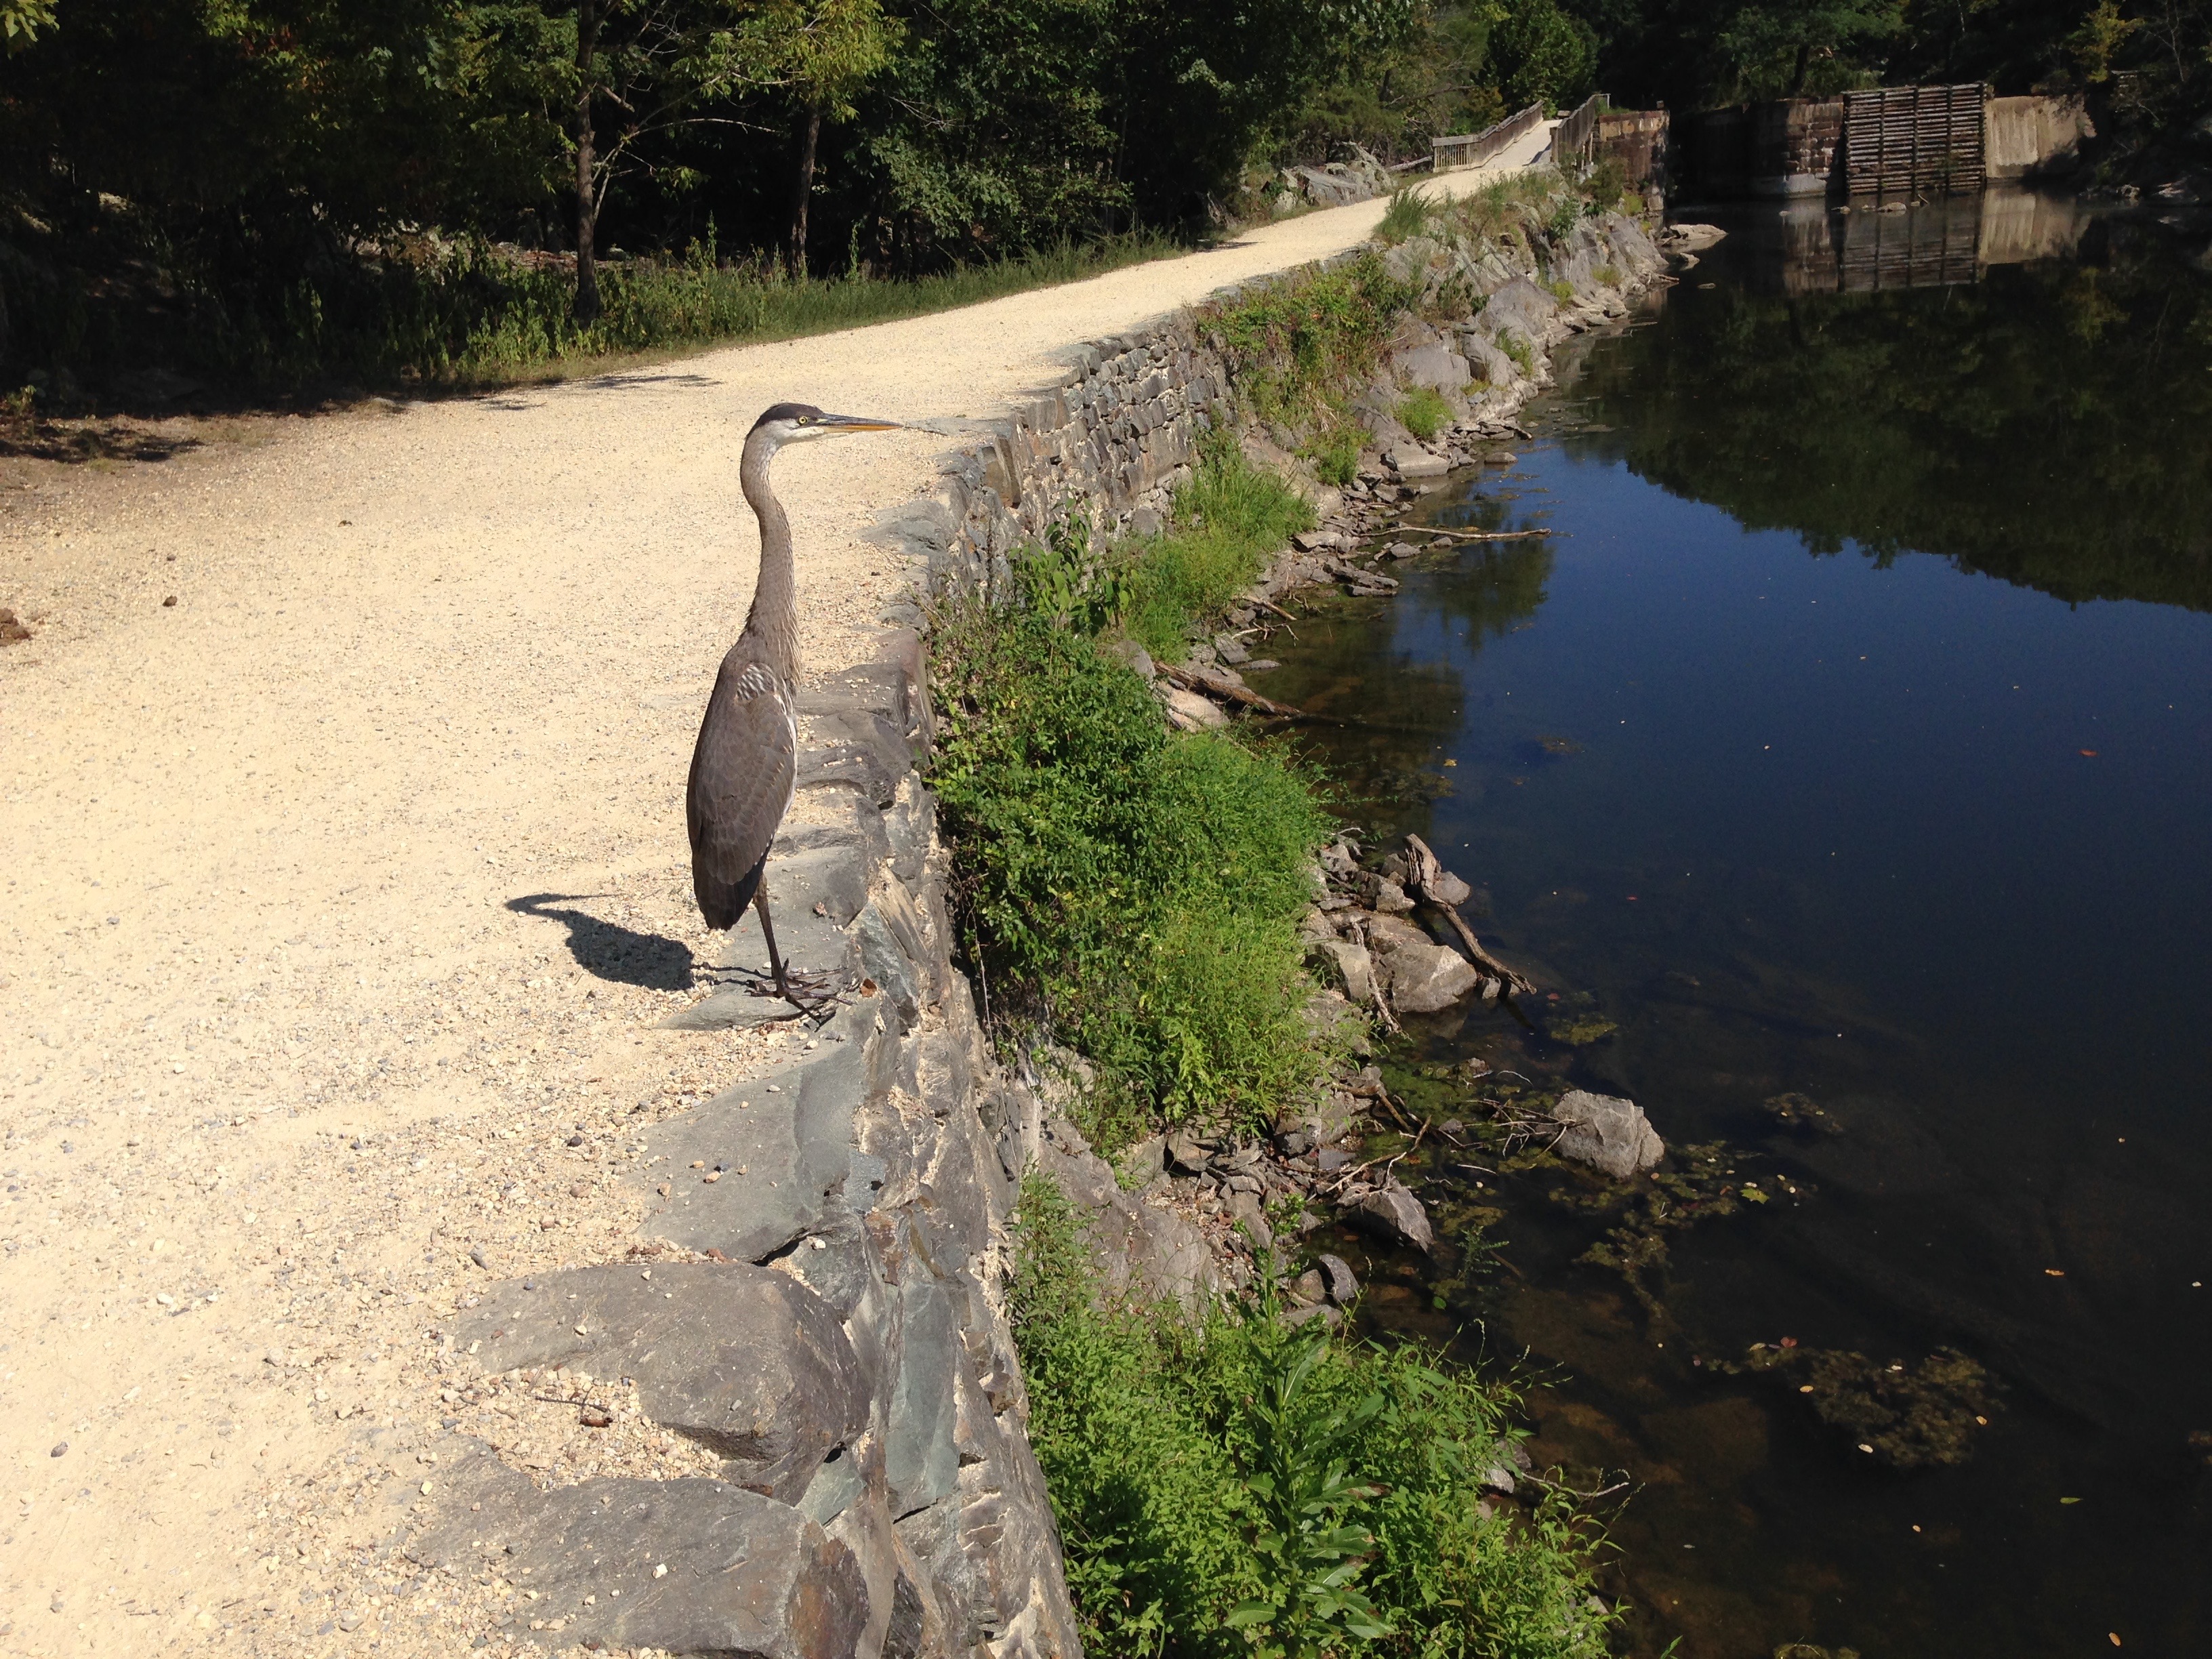
The heron simply saunters a few feet down the path and stops there. However, now a bicyclist is barrelling down the path toward us and I feel certain this will freak the bird out and send it on its way. Action shot to come!

IMG_1139


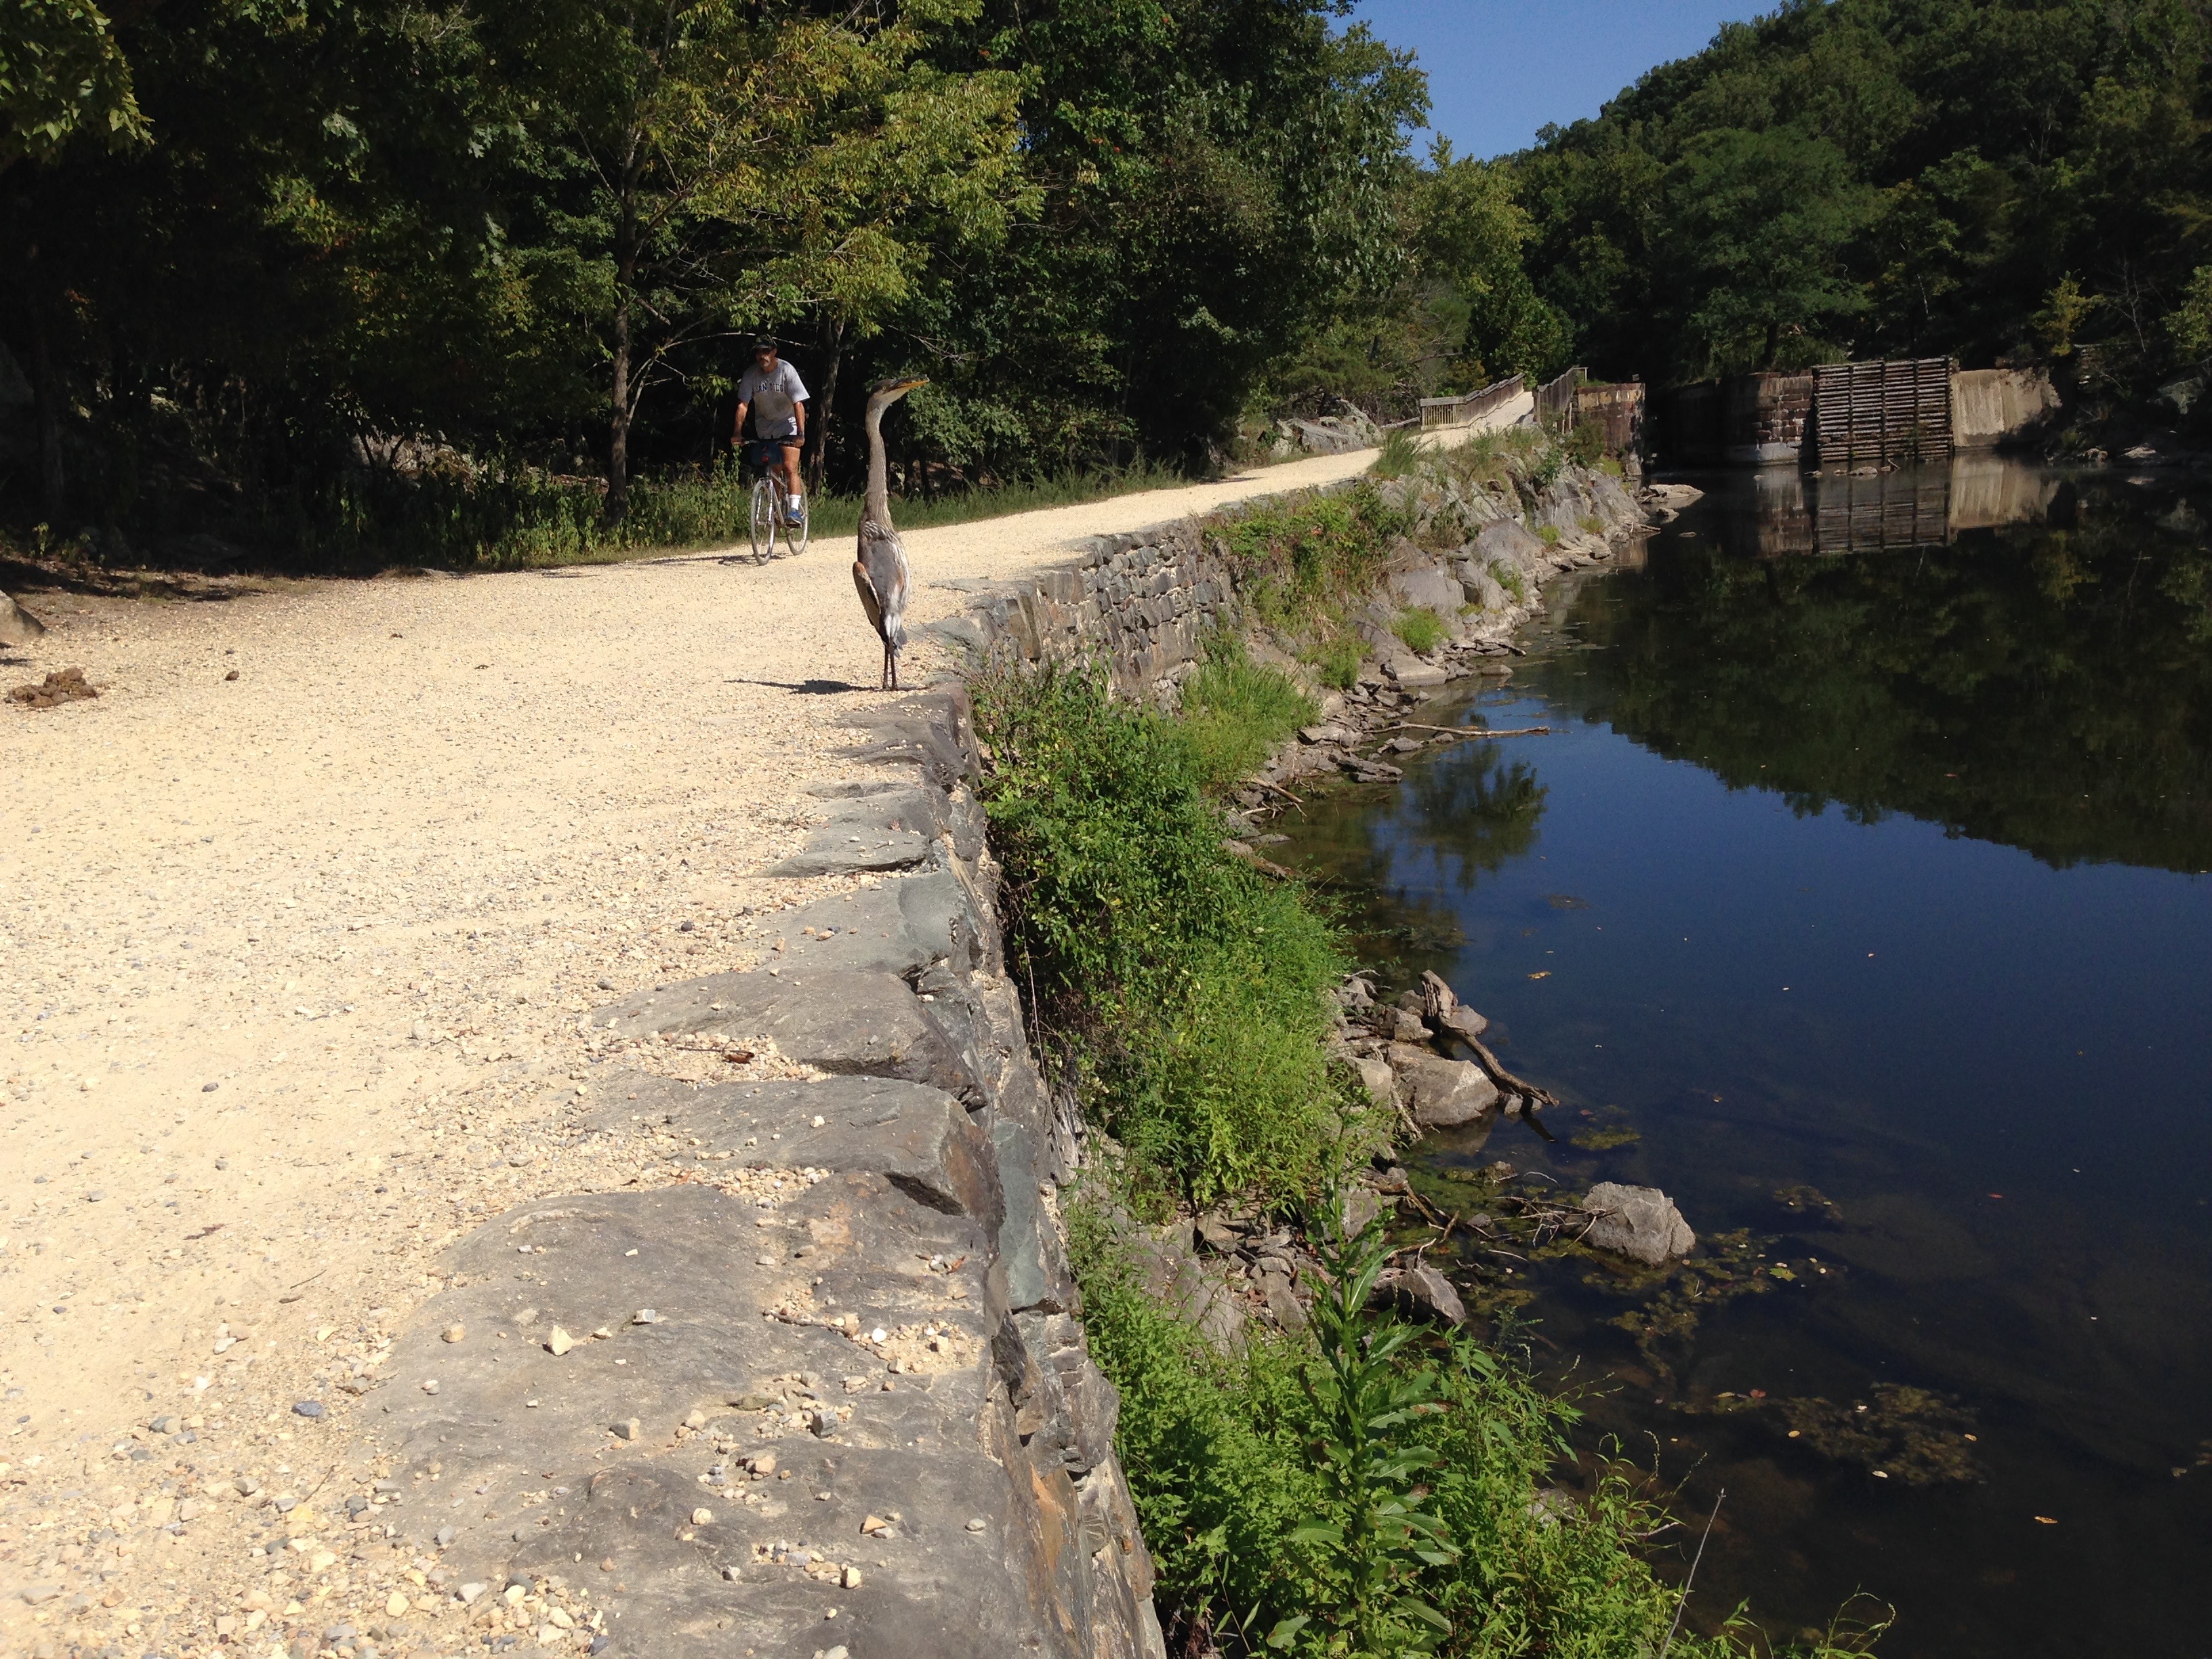
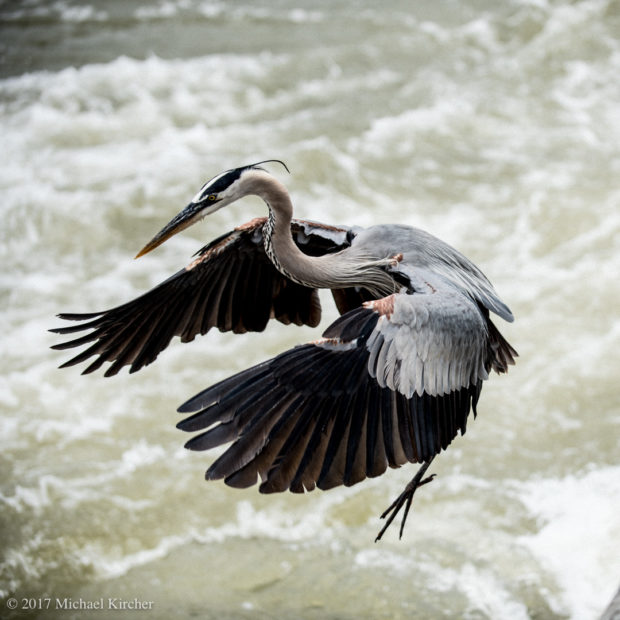
Nope. The creature casually ignores the bike and opens its wings and begins to dry itself in the sun. Its not going anywhere. OK, fine. Now I’m thinking, if it will let a mountain bike zoom past at close range I should be able to walk behind it and get a decent backlit photo from there. So I work my way slowly in that direction. (Careful to avoid that big pile of horse crap there on the left!)

IMG_1141


I move around the backside and get into position. This photo will be OK, I think. Not great. But OK. Then I notice the water stretching out to the right has interesting shadows and light. So I move a little further to my left. And…

IMG_1149


There. Much better. A groovy silhouette.

great blue heron silhouette. c&o canal nhp. potomac, maryland.


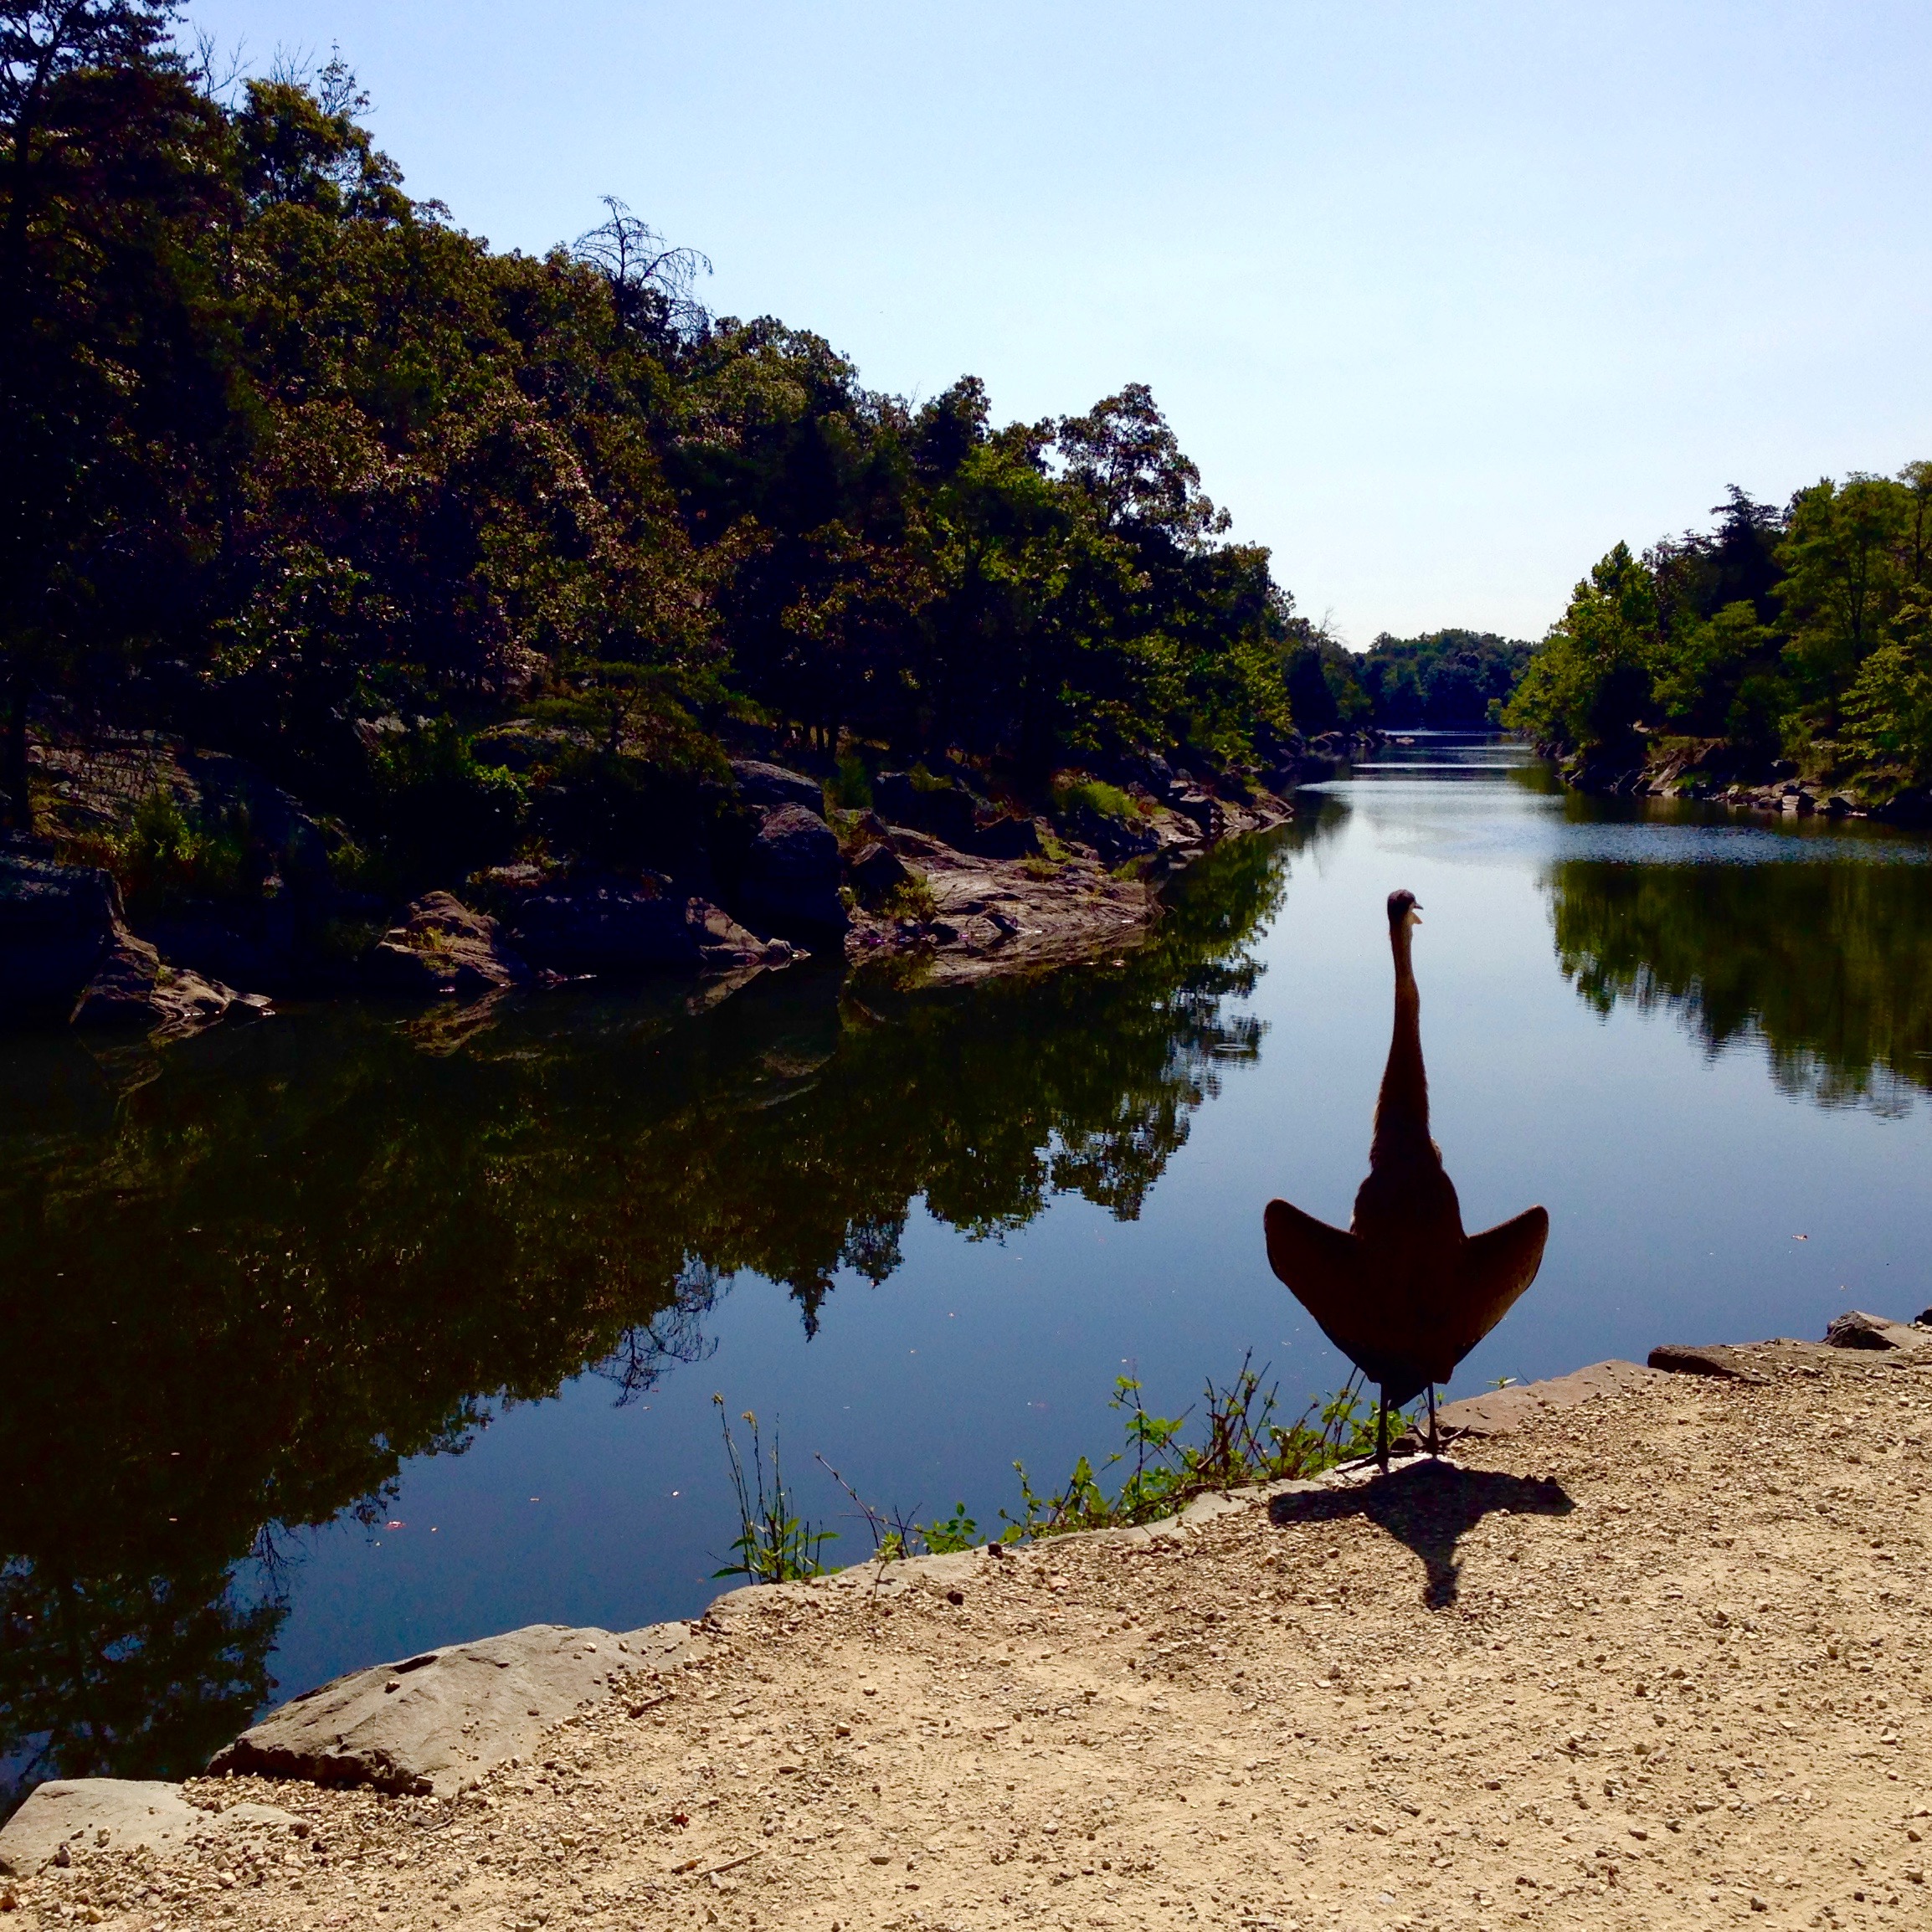
From start to finish this took about 15 minutes. Slow, deliberate movements, a laid back bird, and constantly on the lookout for an interesting composition, I finally ended up with this. Not bad for an iPhone, I’d say.

Thanks for tuning in.

Good light and good shooting.

Taking on the Billy Goat Trail

Although hiking the Billy Goat Trail was more of an effort at 52 than I remember it being at 22, I did make it to the end! I’d forgotten what a spectacular hike it is. Definitely going back again soon.

Hope you enjoy this video.